ELEONORA DRESS BY SILVERSAGA

Summer is in full swing, and “boy-oh-boy” are we filling the heat. Therefore, flowy summer dresses made with lightweight fabrics are top priority right now as I continue rebuilding my wardrobe. I’m focusing on adding pieces that can serve multiple purposes so that I can get more wear from the garments I sew. When I ran across the Eleonora Dress on Instagram, I was instantly drawn to the feminine, comfortable looking silhouette. This is a collaboration with Core Fabrics and they’re offering you a fabric discount below, so keep reading and let’s get into this dress.

Pattern Information
The ELEONORA DRESS is by Silversaga Patterns. I had never heard of this company before, until I saw it on Instagram being worn by Sara Johansen. I loved how delicate and simple the dress looked and knew I wanted to make one for myself. Then I found more makers who had sewn the dress and became even more excited to add it to my wardrobe.

According to the Silversaga website description, the Eleonora Dress is inspired by vintage chemise dresses, but with a modern take. The dress has adjustable elastic and tie neckline and waist casings. There are beautiful ruffles around the neckline. It comes with A – E cup sizes, raglan sleeves with elasticized casing and ruffles. View B has an elastic casing under the bust. View C has shirring above the waist, giving it a fitted silhouette. I made View C.

The dress is available in PDF only in European sizes 34-50 | UK 6-22 | US 2-22, with A – E cup size options. The company rates the pattern as Intermediate and I agree because of the shirring technique. While I didn’t follow all the sewing instructions, I did read through and they were very detailed and easy to follow.

After seeing my post about the dress on Instagram on Monday, Silversaga Patterns decided to offer a 20% discount on the Eleonora Dress when you use my code, ANITA20. Head over to their ETSY STORE to get your discount while it’s available for two weeks. The codes expires around July 9th, 2024. Here are some closeup photos showing all the details of the Eleonora Dress.


Fabric Information
The pattern suggests lightweight woven fabrics, such as Cotton Voilé, Votton Lawn, or Cotton Double Gauze. I used this beautiful POLKA DOT VISCOSE TWILL from Core Fabrics. It’s a mint color with cream dots. The fabric is lightweight with a beautiful drape, making it perfect for the Eleonora Dress. As part of our collaboration, Core Fabrics provided the fabric and thread for me to make the dress.

I’m happy to announce that Core Fabrics is offering you 10% off the Polka Dot Viscose Twill fabric when you use the code ANITA10. It’s available in Mint/Cream and Periwinkle/Cream. It’s perfect for dresses, Blouses, and skirts and is fully opaque. As part of the collaboration with Core Fabrics, I receive an affiliate commission for all purchases using my code.


Inside the Garment
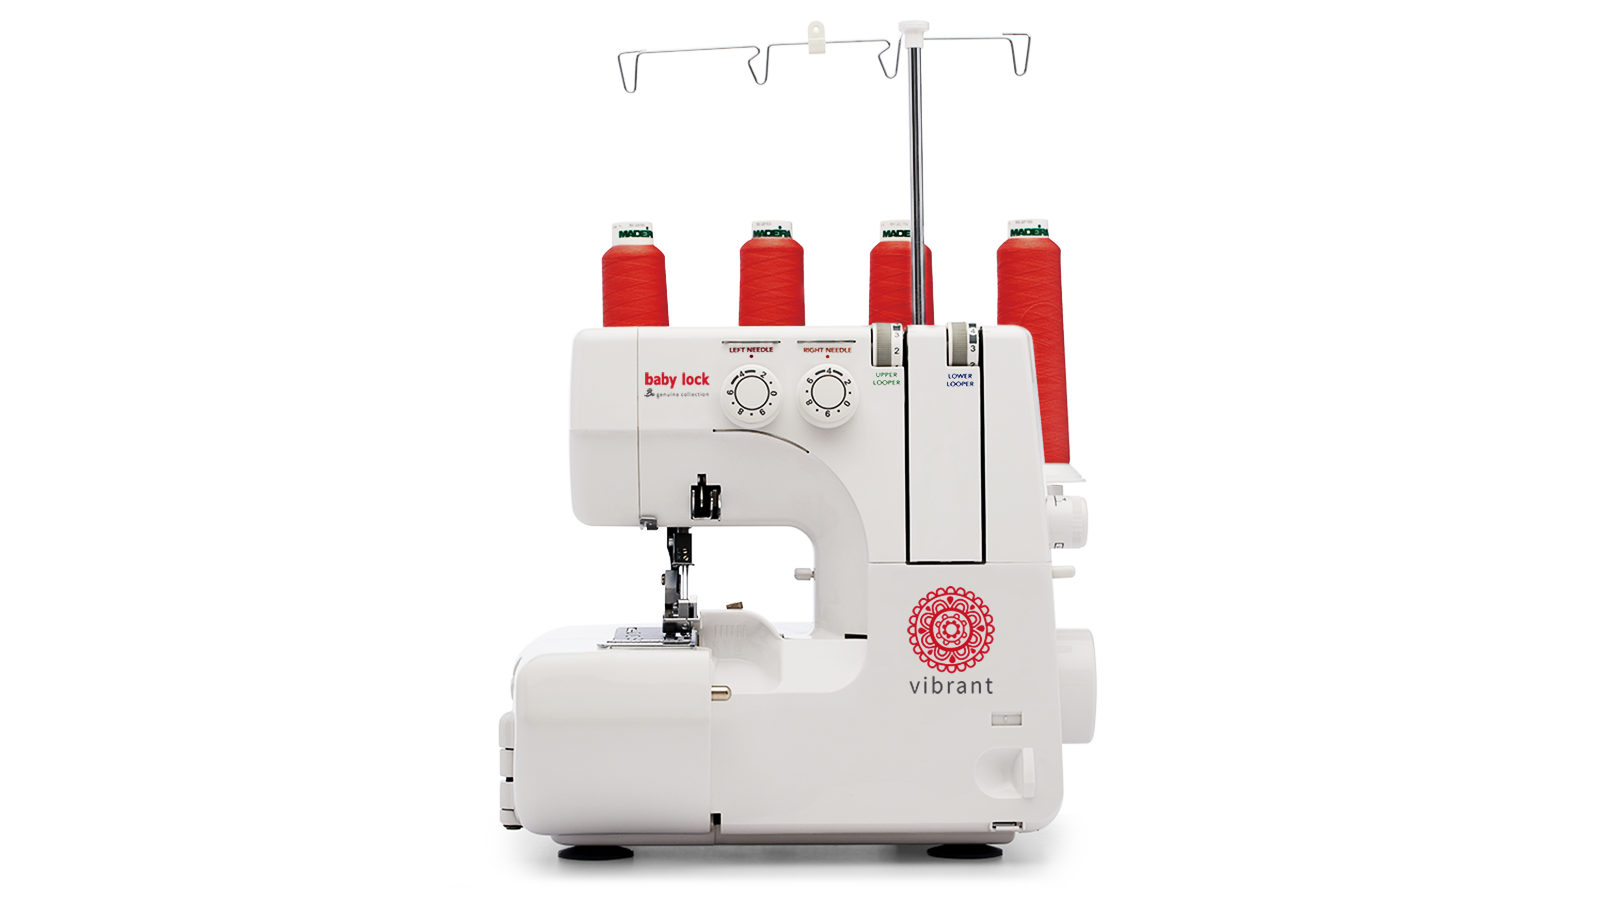
The Viscose Twill was really easy to work with and I used my BABY LOCK CHORUS and VIBRANT SERGER machines to sew and finish the seams for neat insides. Here are some closeup photos from the inside of the dress. The inside photos were taken before I made an alteration that will be explained later. Then I’ll show new inside photos after the alteration.


Notions Information
The only notions needed are thread, 1/4″ elastic, single-fold bias tape (View B), and elastic thread for shirring (View C). Core Fabrics sent me two spools of matching, mint colored thread by Gütermann. I used the fashion fabric to make my own bias tape to create the drawstring tie at neckline. I purchased the elastic thread from Wawak.

Alterations Information
I made a few changes to the bodice of View C. Instead of sewing buttonholes for the neckline tie, I inserted eyelets.

The pattern calls for three rows of shirring but I wanted my rows closer together and lower on the bodice. Therefore, I sewed 10 rows, each 1/4″ apart. I wanted a bit more structure in the bodice. This was my first time shirring fabric, and my first time using elastic thread. I needed to practice first and boy am I glad I did because it took me several tries before I got the hang of it. I almost gave up and created faux shirring. You can see in the photo below that I practiced on 4 different scraps of fabric. On scrap #3 you see the elastic. This is when I almost gave up and started testing rows of elastic for a faux shirring effect. But I decided to try once more and achieved success on scrap piece #4.

I had to keep adjusting the stitch length and thread tension on my machine to get the right combination. Below is a photo of the settings that worked for my machine and fabric. I used a Straight Stitch, 5.0 mm Stitch Length, and 9.0 mm Thread Tension. I didn’t make any changes to the presser foot pressure, but I imagine that would be a factor when working with different thicknesses of fabric when shirring. These settings helped me to finally get the shirring done.

However, once I tried the bodice on, the shirring stretched out of shape. No problem, I used the steam from the iron to shrink the elastic again. But when I attached the skirt, each time I pulled the dress on, the shirring would stretch out of shape and not recover. I’m not sure if I did something wrong, but I wasn’t liking the fit with the shirring stretched out. Therefore, I sewed in 5 rows of elastic to cinch in the waist so that it would fit better. I spread the rows of elastic by skipping rows of shirring. So, I ended up doing faux shirring after all. Hahaha! It worked and I’m satisfied with the outcome. I’ll try the shirring again another time. Have you been successful with shirring your own fabric that had good recovery after being stretched? This is how the inside looked after adding rows of elastic.

If I were to do this again, I would create a casing for the elastic using the seam allowance where the bodice and skirt are attached. That’s what the pattern instructs you to do anyway. But I had already cut the seam allowance away when surging. After finishing I realize that the elastic was tighter than I wanted but I can redo that later.

Styling Options
I made the dress to wear casually around the house, to run errands, and out to lunch with friends. Here I have it styled with a pair of crochet mules in a mint/yellow color. I actually saw the shoes after I received the fabric and had to have them. I’ve added pearl earrings, bracelet and ring. I finished it off with a clutch purse I made several years ago (maybe 2015). I have a CLUTH PURSE TUTORIAL on my YouTube channel if you’re interested in making one for yourself.


For the second styling option, I made a matching headband to wear with the dress sometimes. I’ve styled it with a pair big hoop earrings and a simple bracelet. I really like this look and also plan to wear it with flats. I followed this YOUTUBE TUTORIAL to sew the headband. It’s a quick project that’s perfect for any scrap fabric you may have in your stash.


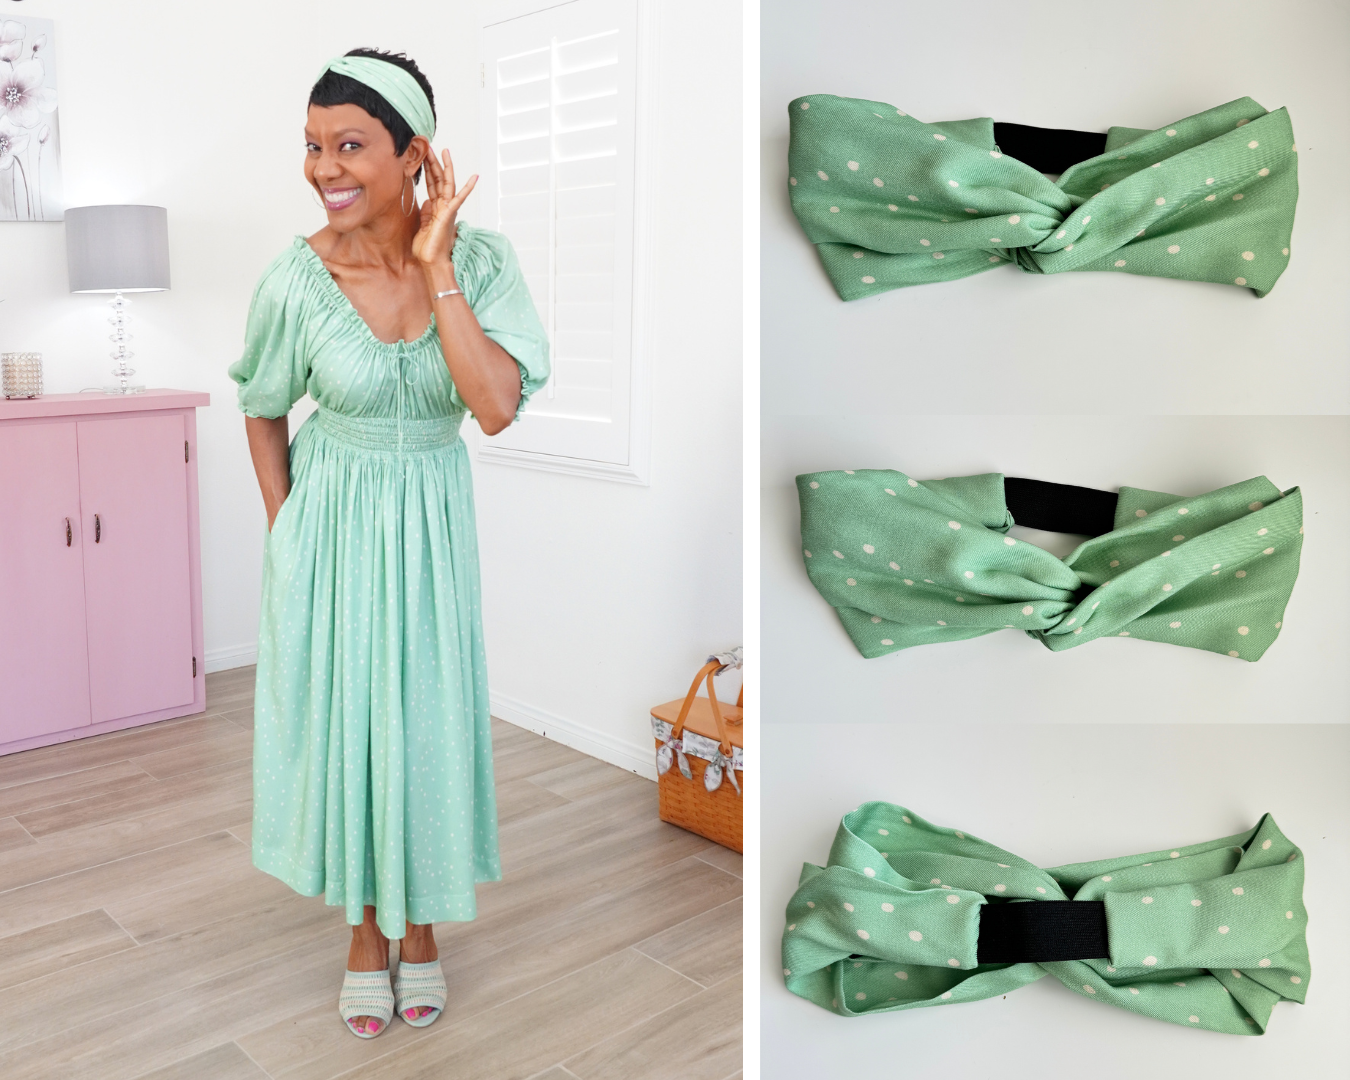

Finally, I’ve added a floppy straw hat and basic pumps. This option would be nice for a tea party look.


What do you think?
Which styling option do you like? I would love to hear your feedback. Scroll to the very bottom of this page to leave a comment.

Thank you for stopping by today! 💕

Other Related Links
(DISCLAIMER: This blog post may contain affiliate links, which means that if you click on one of the product links, I’ll receive a small commission on qualifying purchases. All opinions in this post are my own.).)
Don't Forget your Sewing Project Checklist
I created a Sewing Project Checklist to help you stay organized while sewing your garments. If you missed the video where I shared 3 Steps to Time Saving Sewing for Beginners, check it out to learn how you can streamline your sewing process. Tap the button below to get a Free PDF copy of the Checklist.

Join My Community
Join others in my community for early access to new courses, exclusive member benefits, giveaways and updates when new content and products become available.

You Should Share This Blog Post With Your Friends
- Pinterest
- Facebook
- Twitter


BABY LOCK SEWING MACHINES


This Post Has 25 Comments
Love your version of this dress! The photo with the wide-brimmed hat the whole ensemble looks elegant for a wedding, whereas the styling with the headband is great for a causal look.
Another gorgeous project, Anita! As for shirring, I admire your jumping in. I took a class and then experimented quite a bit at home.
The times that I had trouble with the stretch rebounding and the shirring being consistent and with the look I was going for was when my fabric was too heavy. I had wondered when you showed us your fabric how well that would work. It is a very lovely fabric…just gorgeous, but may be the reason the shirring was fussy for you. The fabric they show in the photos of the dress on the pattern looks almost like a cotton lawn which works very well with shirring. The lighter fabrics work better. I used a JoAnn cotton that had a Disney design with some sparkle and even that was too heavy.
Also try using your finger to sort of bunch up the fabric behind your presser foot as you sew your shirring. That can help too. Good luck and keep going! Your followers love your work.
Where can I find an affordable dress form?
Hi Neosha! I don’t know what’s affordable for you, but you can do a google search to see what you can find. I got my form from pgmforms.com.
Anita, this dress is beautiful. I love the fabric and the ways that you styled it. I know your blog is about sewing, but can you give some insight on your dietary lifestyle change.
Thank you, Sharon! I switched over to a Whole Foods Plant Based (WFPB) lifestyle last year. I eat fresh fruits and vegetables, with occasional grains, nuts and legumes. I’m mostly raw, with occasional cooked meals. Lots of water (1 gallon/day). Exercise at the gym and walk at the park 5 days/week. Try to get adequate rest and keep stress as low as possible.
All of the styling options are wonderful on you. I really like the headband. I had not thought of that option.
I’m curious as to what shirring is. What’s faux shirting? Maybe all of this is too advanced for me.
If I knew more about sewing I would certainly love this dress, but if you with your experience had challenges, then I don’t stand a chance. Someday, maybe…..
Hi Cindy! Shirring is when you use elastic thread to create stretch on a portion of woven fabric. As you stitch rows on the fabric with elastic thread, it creates gathers that make the fabric stretchable. Faux shirring is faking the technique that is supposed to be created with elastic thread.
Anita, this is a sassy strategy to combat the summer heat and humidity!! Polka dots are so fashionable and the color you selected looks quite cool and crisp. This style dress is definitely you and the various looks are stunning. I like all of them but I think my favorite is the one with the floppy hat and pumps. Thanks for sharing info about shirring and an alternative option. As always, your sewing skills are impeccable. That head band is a must so I’ll have to try it soon. Bless you for sharing another great sew. Without a doubt, your new wardrobe will be a collection of runway fashions. Thanks for sharing!!
Thank you so much, De, for always speaking such beautiful words about my projects. I really appreciate your encouragement.
Lovely dress. Thank you for sharing the issues you had with assembling your dress.
You’re very welcome.
Hello Anita,
You look so stunning in your beautiful dress! I love each way you have styled it. The fabric is gorgeous and has a lovely drape, which is perfect with the full skirt and the shirring really emphasises your figure. I am sure you will have plenty of wear from this dress. Absolutely gorgeous!
Love from Jill x
Thank you Jill! Yes, I definitely plan to get lots of wear from the dress.
Thank you Jill! Yes, I definitely plan to get lots of wear from the dress.
I love the Tea style…especially since my friend and I will be hosting a Tea social in September. I enjoy learning from you and seeing all your beautiful makes. I’ve sewn for years but never made my seams as nice as you. I’ve gotten my serger out of the closet (25+ years!) and have started to use it now. ThankYou!
Thank you so much, Ronda! My heart is smiling to read that you’ve started using your serger after 25+ years. WOW! I’m happy for you. 💕
The tea party styling is my favorite. I love the periwinkle color too.
I love the periwinkle too, Cheryl!💕
Oh, this is just beautiful! Such a lovely fabric choice! Everything you make is fabulous, but I especially love this dress!
I actually just bought a dress nearly identical to this one, but sleeveless, from Kohls, so you are right on trend!
Thank you Laura! Oh wow! Shout out to Silversaga Patterns for being on trend.
Anita,
Once again, you have designed a classy look. Love the look and it looks fabulous on you. All the styles are gorgeous but I think the headband is super fun? Thanks for the breakdown on the shirring technique. Fabulous?
Thank you Monique! Yes, I think the headband is fun too. Can’t wait to wear it with my dress.
Anita you are stunning and so is the dress! I’m still a baby beginner and I only dress nice to go to church. The rest of the time I’m out working in my yard getting dirty. I love what you do and you are inspiring! God bless you!
Thank you so much, Ana! God bless you too. 💕